
 |
||||||||
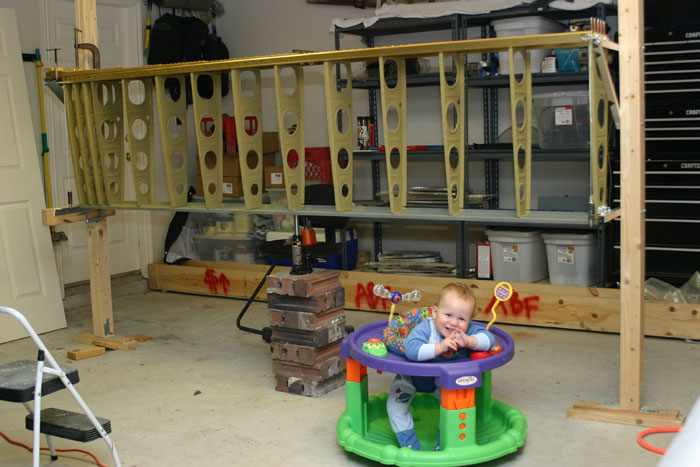
| Now we have some real progress! After much work of leveling, checking, rechecking, and rechecking, the right wing skeleton is finally in the jig. My little helper here did a good job of helping out along the way. The skeleton is clamped to some aluminum angle at the root end (left) and bolted to some angle on the outboard end (right). In the center you need some kind of jack or something to support the center so it doesn't sag. Don't use a hydraulic jack for this! I set it up and checked the alignment (with fishing line streched across the structure) and within 2 days it began to sag ever so slightly. I'm guessing the fluid in the jack seeps over time. Anyway, I constructed a screw jack with a 2x4 and a 5/8 threaded bar. That works great! |
||||||||
 |
||||||||
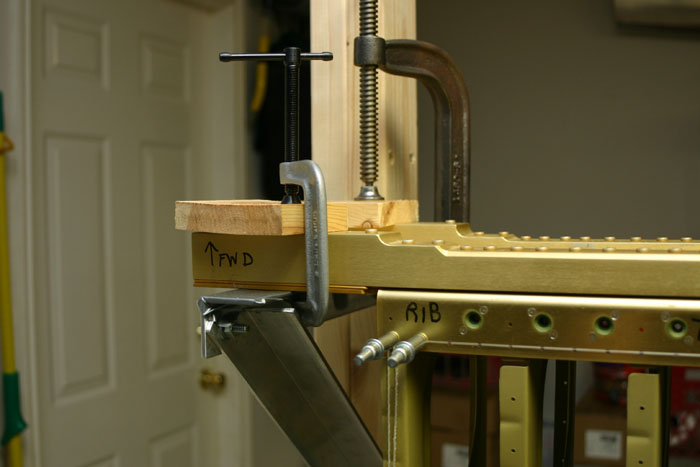
| Here is how things are attached at the inboard end. You basically clamp the spar to the angle. Make sure to use some wood blocks or something so you don't screw up your expensive (and important!!) spar. | ||||||||
 |
||||||||
| Hear is the rear spar at the inboard end. Same story. Just clamp it down. | ||||||||
 |
||||||||
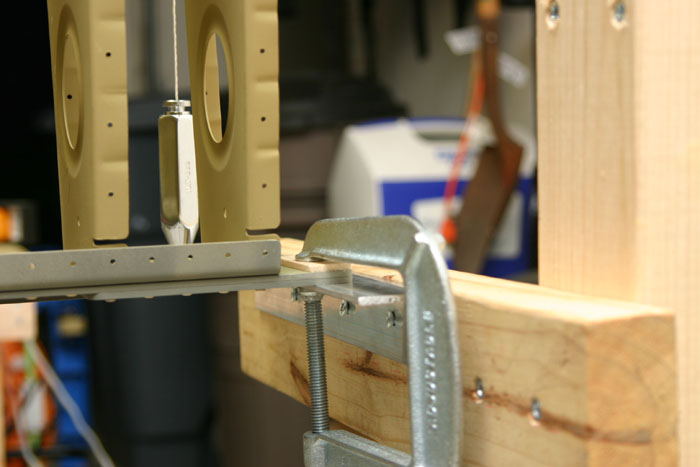
| And here is the outboard end of the forward spar. You can see that I have bolted it to the angle using some scrap laying around the shop. I used 1/4" bolts to support the structure. | ||||||||
 |
||||||||
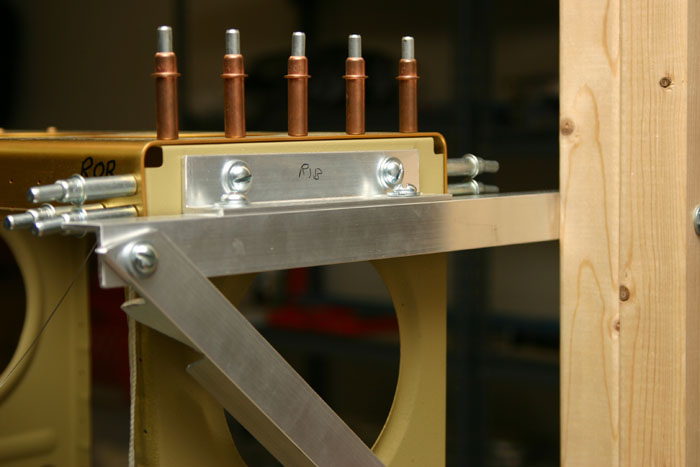
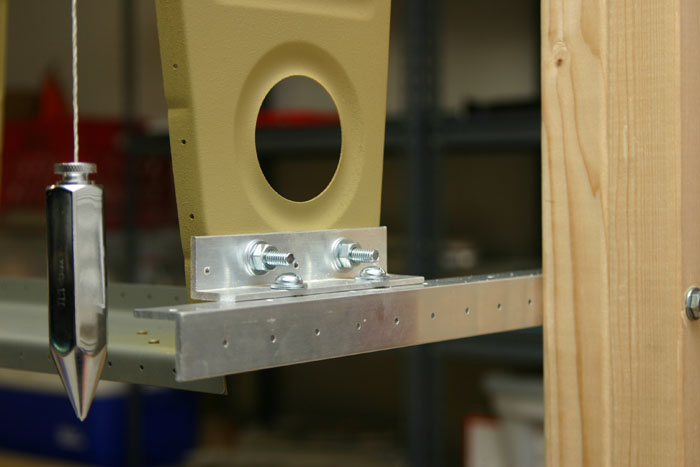
| This is the rear spar at the outboard end. Again, it is bolted down using 1/4" bolts. Notice the plumb bob hanging there. I hung one at the outboard end and another one at the inboard end. You measure the distance between the bob and the rear spar flange. The distance should be the same @ the outboard and inboard ends. If it isn't....then you have a twist in your wing and you need to fix it before drilling any skins on. | ||||||||
 |
||||||||
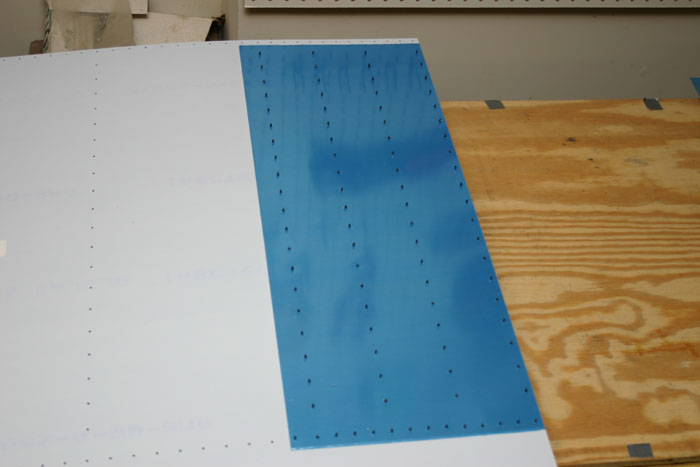
| After getting the skeleton in the jig, its time to work on the skins. First you cut a piece of sheet to serve as a doubler for the wing-walk. This is where I will (oneday!) walk on the inboard section of the wing to get into the cockpit. | ||||||||
 |
||||||||
| You just use the skin as a drill guide to drill the holes into the wing walk doubler. | ||||||||
 |
||||||||
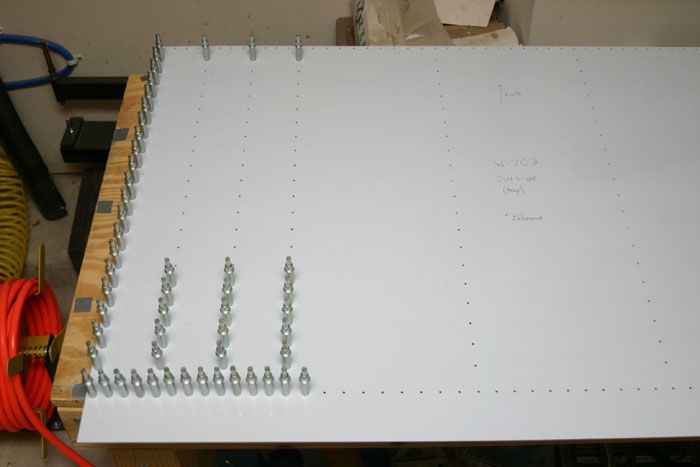
| Here is a pic of the inboard top skin cleco'd onto the skeleton. The holes matched up perfectly. | ||||||||
 |
||||||||
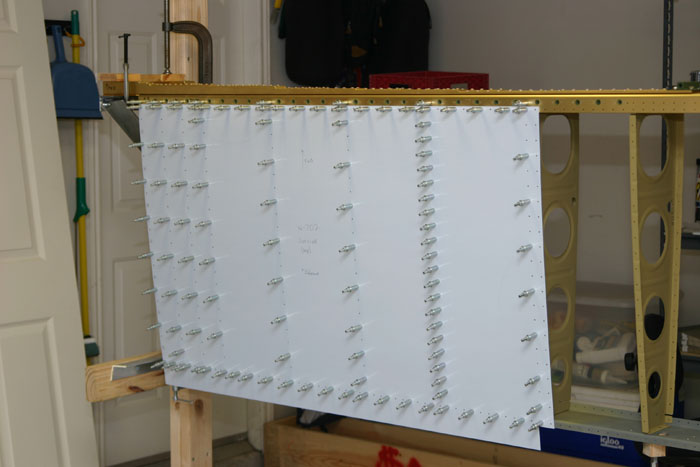
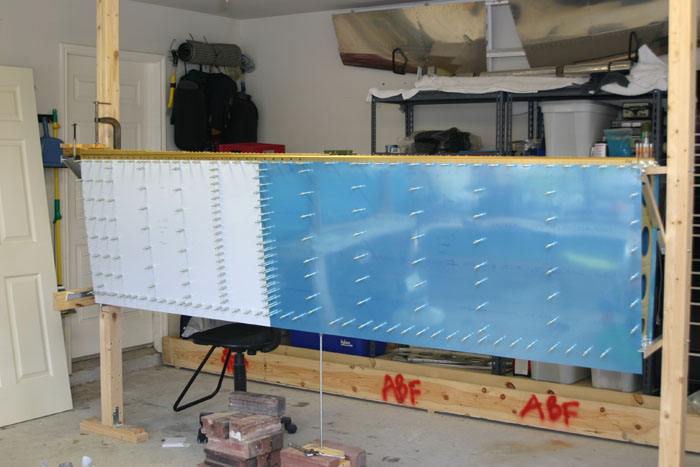
| Next you go ahead and cleco on the outboard skin. The outboard skin should lay on top of the inboard skin near the eighth rib (counting from the inboard). I noticed that even though I leveled everything I still need to wrestle with getting the cleco's in the holes for the outboard skin. I was worried at first....but once you get a few clecos in the structure straightens up and everything fits just fine. Next I match drilled the skins to the skeleton. | ||||||||
 |
||||||||
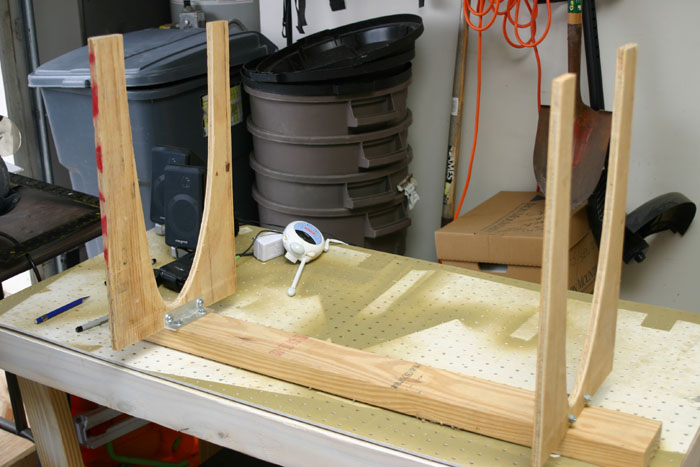
| Now a diversion from the skins. I built this jig to put together the leading edge of the right wing. It is really easy to build. I used a jigsaw to cut out the shape of a rib and just bolted the thing to a 2x4. Easy. It really does help in putting together the leading edge. | ||||||||
 |
||||||||
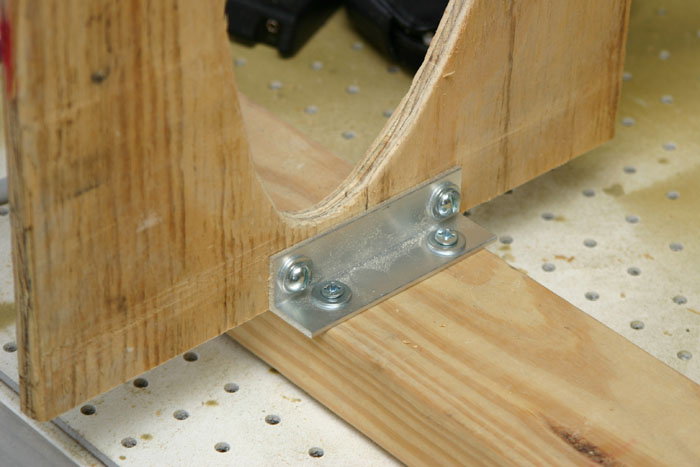
| Just a closeup of how I attached things. | ||||||||
 |
||||||||
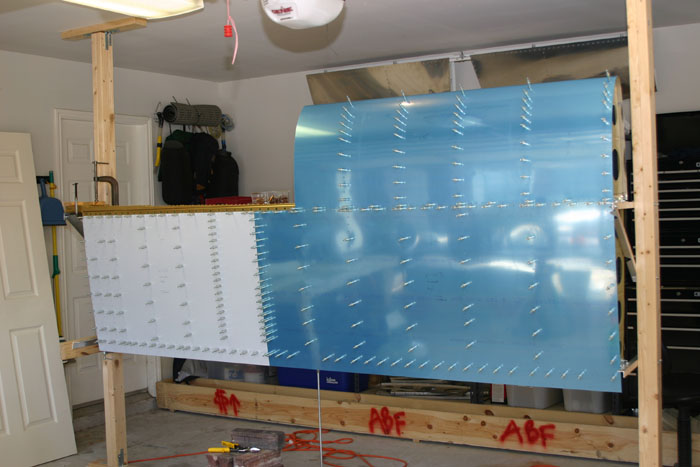
| Now this is a cool pic! Finally looking like something that may be airworthy someday! I cleco'd on the leading edge and match drilled the rib-to-spar and rib-to-skin holes. | ||||||||
 |
||||||||
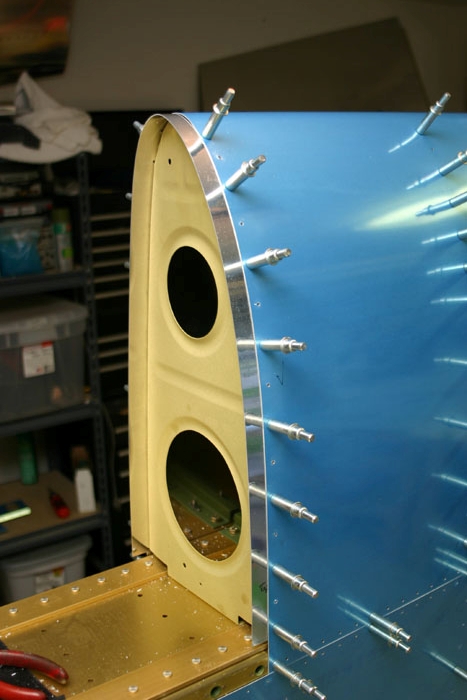
| Here is a pic of the leading edge inboard-most rib. Notice the joint plate that I cleco'd in place between this rib and the skin. None of this was pre-punched (except the skin) so it takes some time to get the alignment right. The fuel tank will sit to the left in this picture and the joint plate helps to support the tank skin. | ||||||||
 |
||||||||
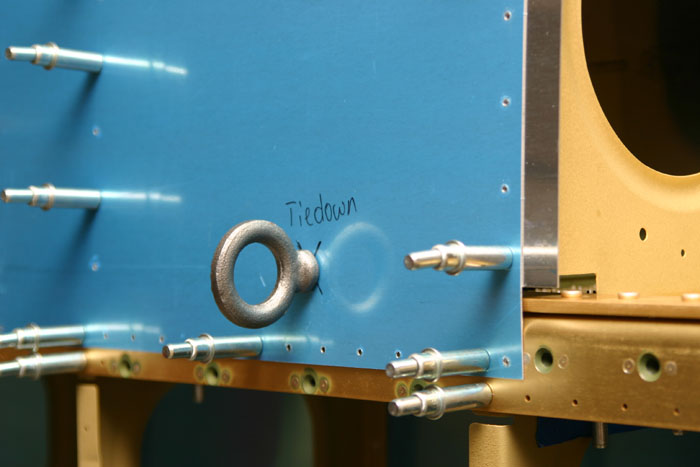
| Here I have cut the hole for my tiedown ring which is inserted here. It is threaded into the tiedown bracket that was constructed and bolted to the spar earlier. I had to do some minor filing of the hole to get things aligned right...but the result looks great! | ||||||||