
|
8/3/03
|
Completed inventory of empennage kit. Vans did an excellent job of packing both boxes. Everything was accounted for! | ||||||||
|
|
|||||||||
|
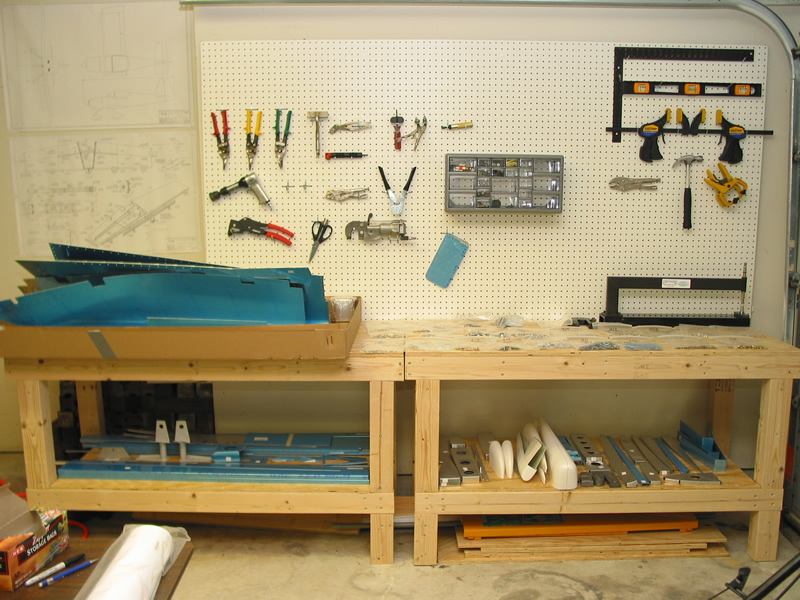
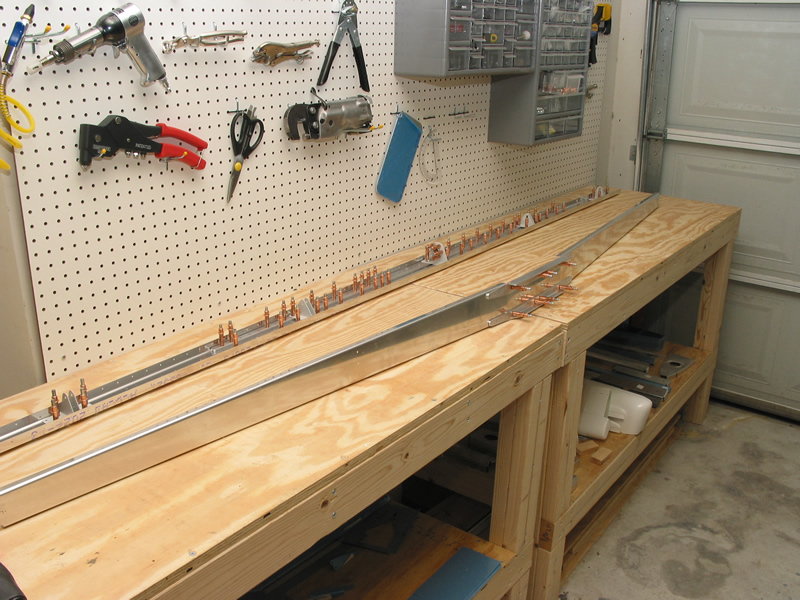
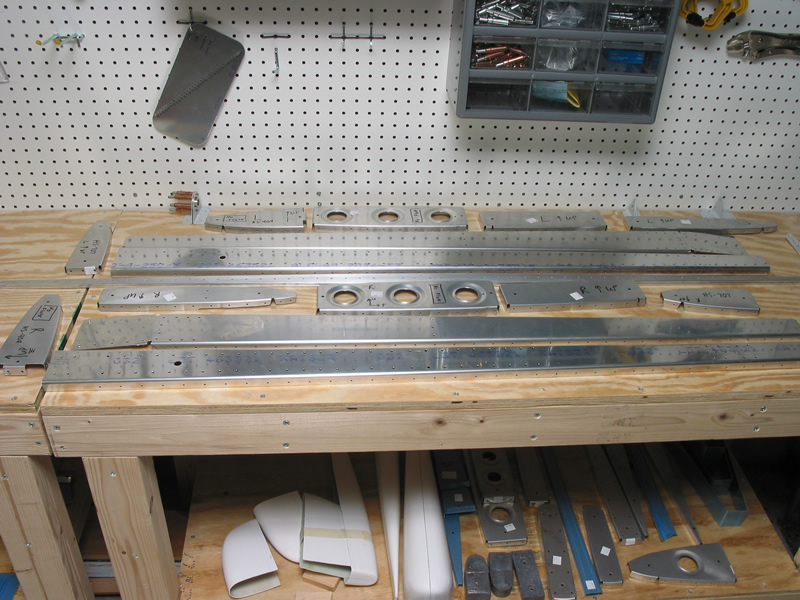
This is the whole emp kit layed out on my workbenches. |
||||||||
|
|
|||||||||
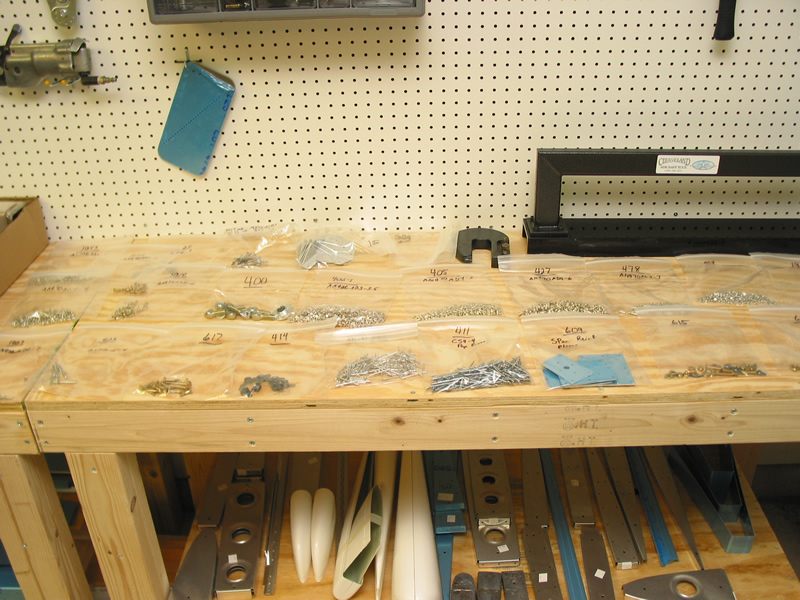 |
Various
fasteners. Several hundred rivets here at least. |
||||||||
|
|
|||||||||
|
8/3/03
(3 Hrs) |
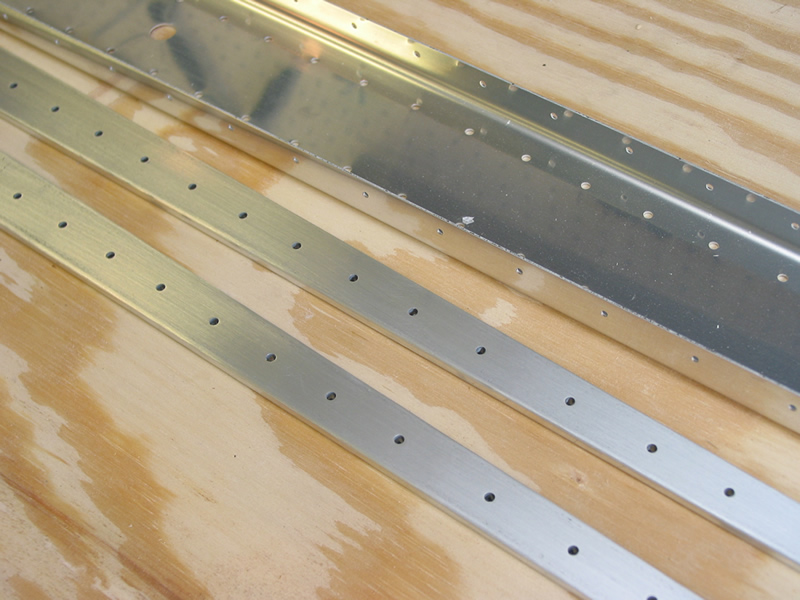 |
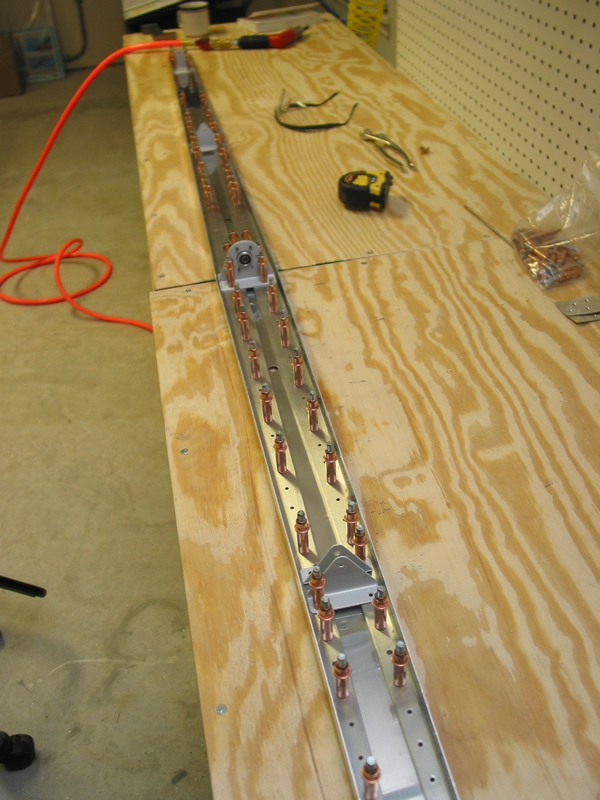
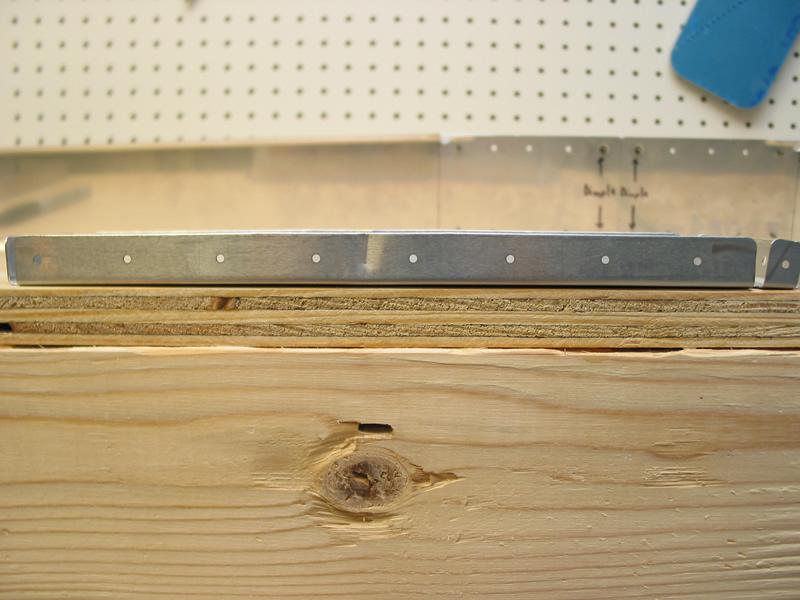
Here are the two reinforcing bars next to the spar skeleton. After a few hours of elbow grease, they are much more shiney than before :-) The last couple of days I rounded the edges of the horizontal stab rear spar reinforcing bars shown here and polished to a satin finish with sandpaper. Not hard but time consuming stuff. | |||||||
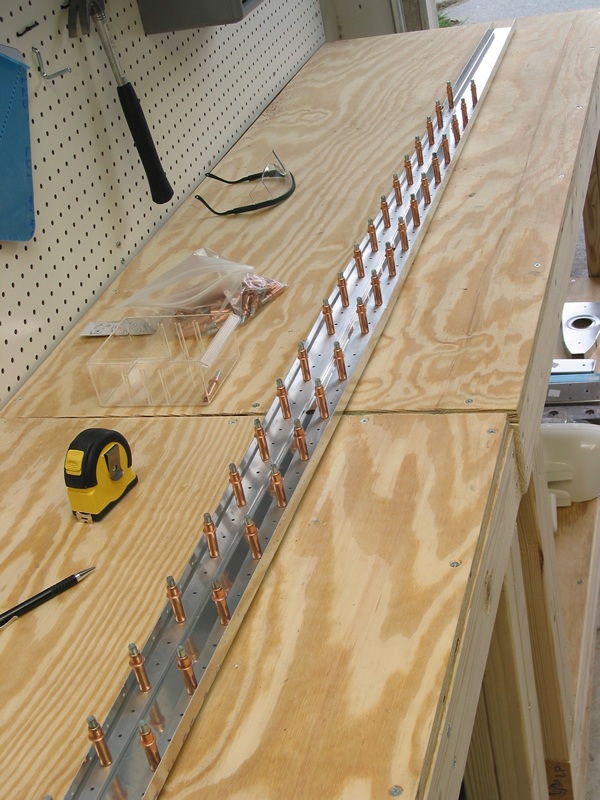 |
The next step is to cleco the reinforcing bars into the spar channel so you can match drill the many holes. | ||||||||
 |
Here i've cleco'd the elevator hinge brakets to the assembly for match drilling. | ||||||||
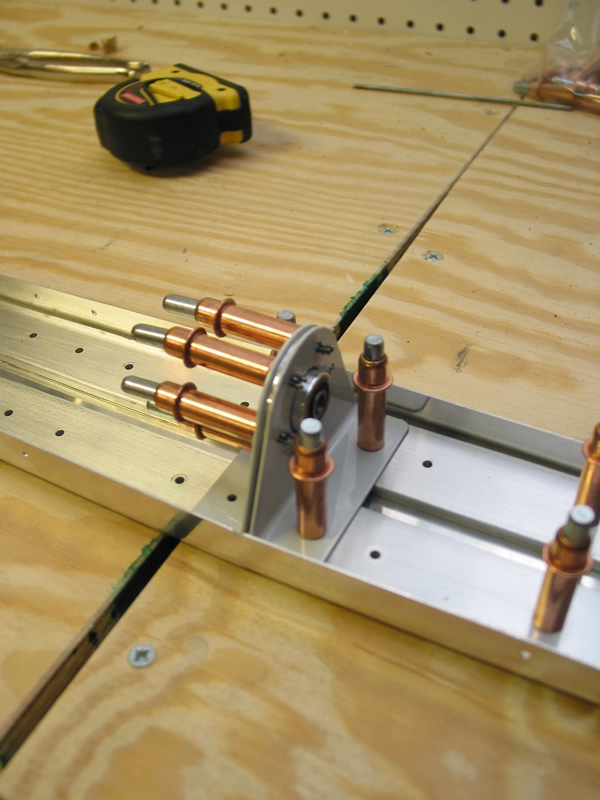 |
This is a close up of the center elevator hinge bracket and bearing. | ||||||||
|
8/11/03
(6 hrs) |
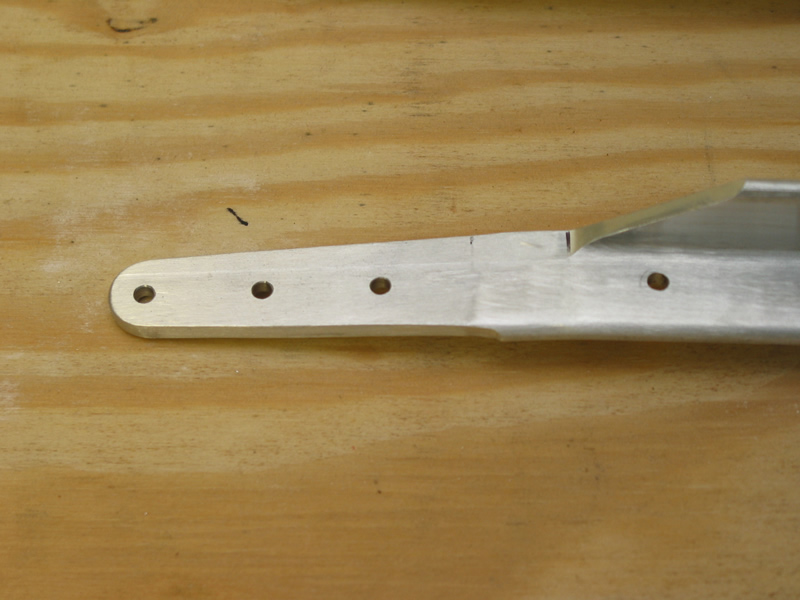 |
There are two reinforcing bars for the forward spar of the horizontal stabilizer. You have to taper the ends with a scotchbrite wheel on your trusty bench grinder. | |||||||
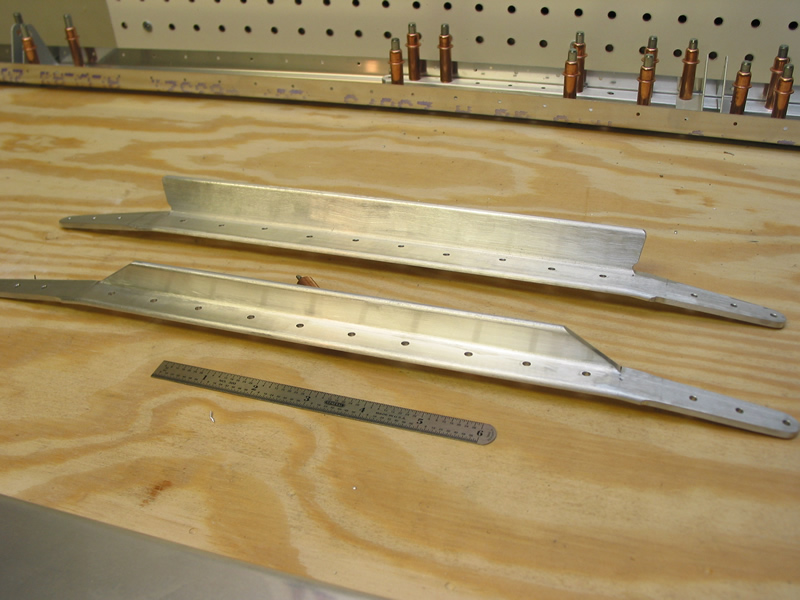 |
Here are both of the reinforcing bars together. The plans call for bending the ends at an angle of 6 degrees, which you do in a vice. | ||||||||
 |
Here is a shot of the forward and rear spars of the horizontal stabilizer cleco'd together. Notice the shape of the forward spar (arrow-shaped). This will basically be the shape of the leading edge of the HS, and is why I needed to bend the reinforcing bars to the 6 degree angle. | ||||||||
|
8/14/03
(4 hrs) |
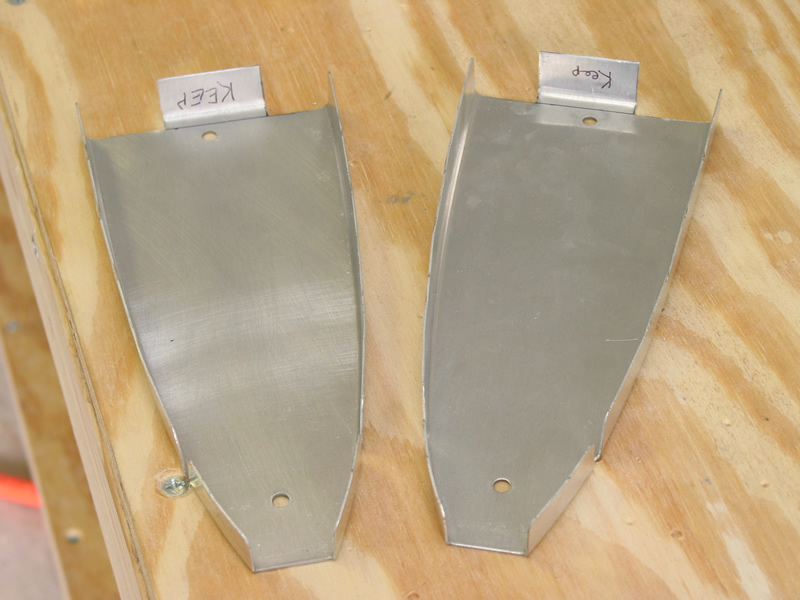 |
Here are the HS-404s, which are the inboard most leading edge ribs in the HS. You have to trim the trailing flange to the measurements on the plans so they can fit over the reinforcing bars on the forward spar. Basically I used the snips followed by a file and the trusty scotchbrite wheel in my die grinder. | |||||||
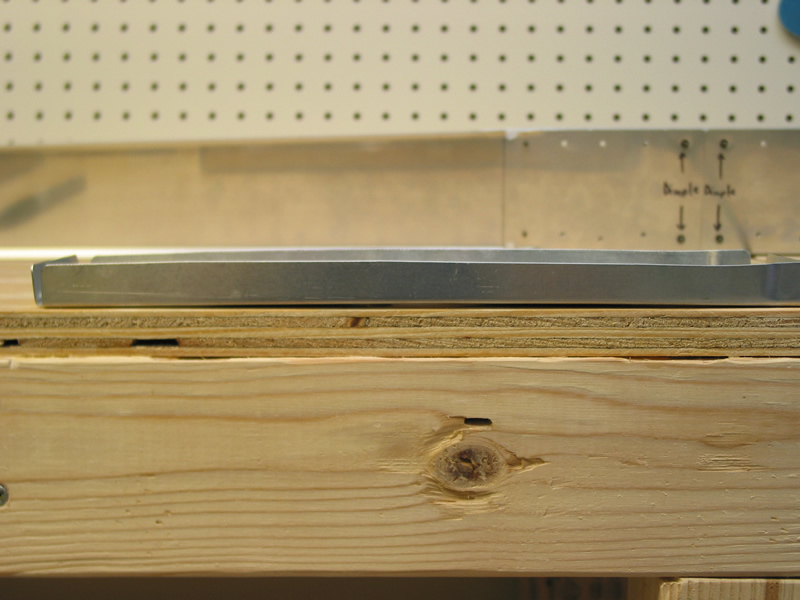 |
Here is an example of a rib laying flat on my workbench. Notice that there is a slight bow away from the workbench due to the way vans manufactures the parts. | ||||||||
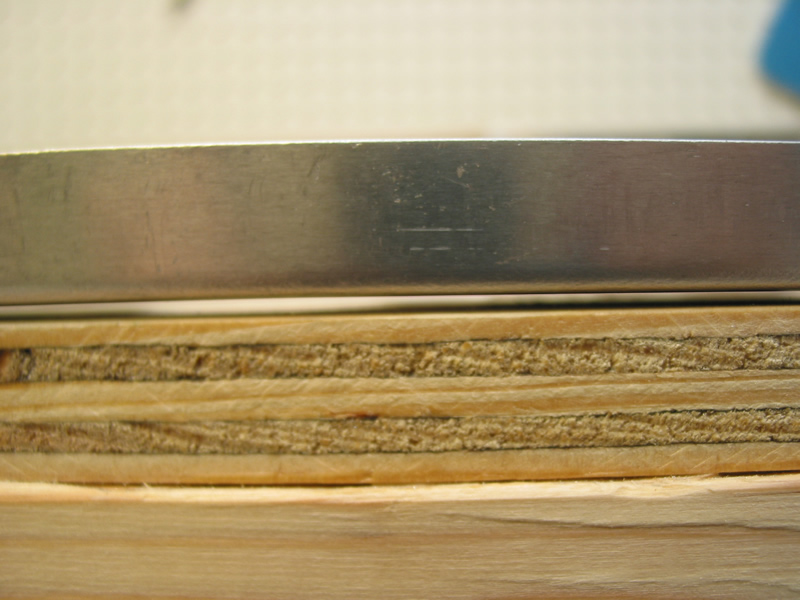 |
Here is a close up of the bow in a typical HS rib. | ||||||||
 |
In order to have the rib lay flat, you need to 'flute' it, which means basically crease the flanges to make the part gently bend back into shape. Here is a rib after fluting. Notice the flute in the center of the rib. | ||||||||
 |
This is a close up of the fluted rib. | ||||||||
|
8/16/03
(3 hrs) |
 |
Here I have the left side HS skin cleco'd on to the spars and ribs. Notice the clamps on the ribs in the foregraound. Those are needed because those particular ribs are not pre-punched at the factory. You use the skin (which is pre-punched) as a drill guide to drill the holes in those ribs. | |||||||
 |
Another shot of the left hand HS assembly with the skin cleco'd on. These clecos are really cool....there are no rivets in this assembly (yet). The entire thing is held together with clecos. | ||||||||
 |
Finished drilling all skin holes in left side of HS. Cleco'd right side skin to right side HS frame (above). | ||||||||
|
8/21/03
(3 hrs) |
Fluted right hand side HS-404 and HS 405. Match drilled the 404 to the 601pp skin after clamping. | ||||||||
|
8/22/03
(4 hrs) |
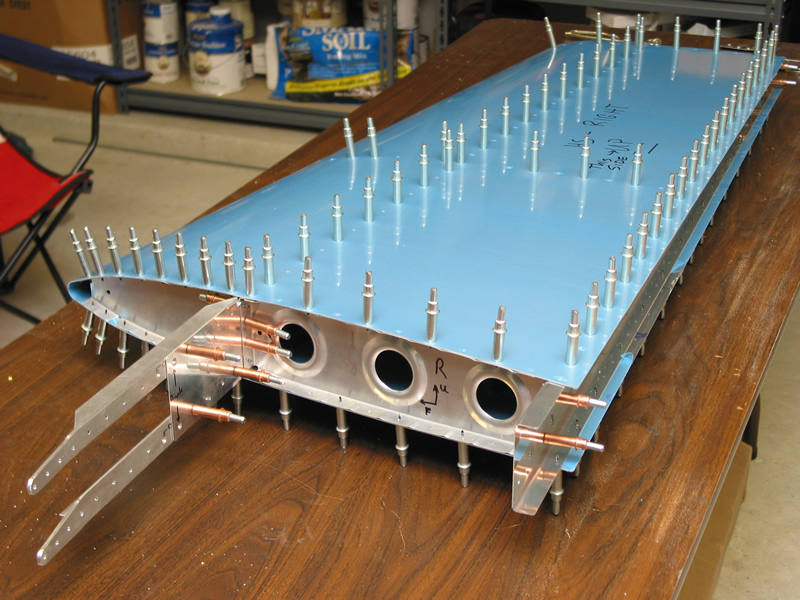 |
Here I have matched the HS-601pp skin to all of the flanges and ribs. Also, the front spar reinforcing bars have been match drilled to the 702 front spar (note the clecos). | |||||||
 |
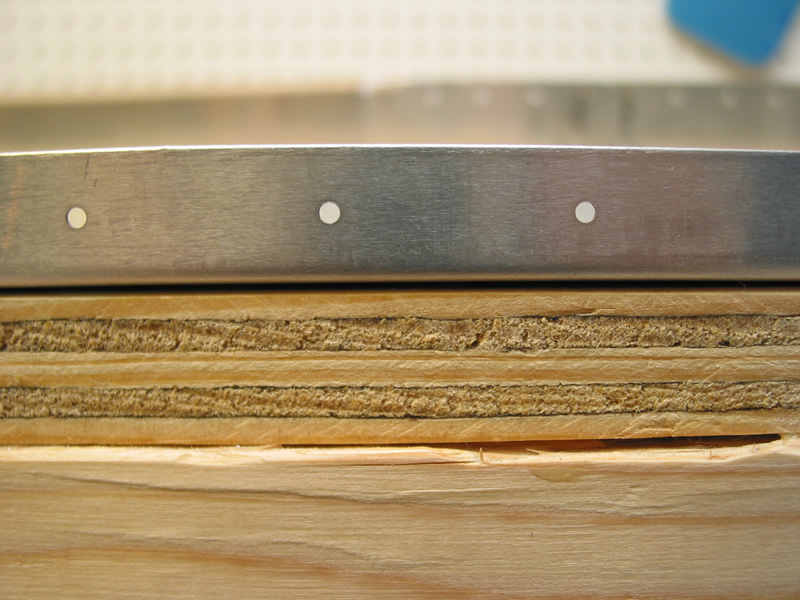
Here is a shot of the outboard holes of the reinforcing bars of the front spar drilled in place with the spar. | ||||||||
|
8/23/03
(2 hrs) |
Did a lot of work today, but don't have any pretty pics to show for it. Basically I dissassembles both left and right HS assemblies, and marked them with a light punch so i will know which parts go on the left and which are on the right after priming. During the priming process you clean the bejesus out of the parts so this step is crucial when you begin the riveting process. After this, I began deburring the skeleton pieces. | ||||||||
|
8/24/03
(2 hrs) |
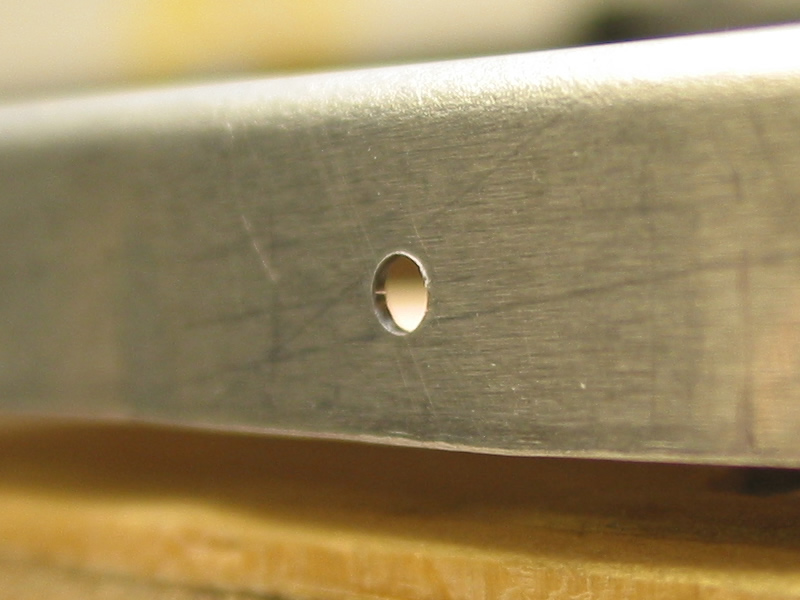 |
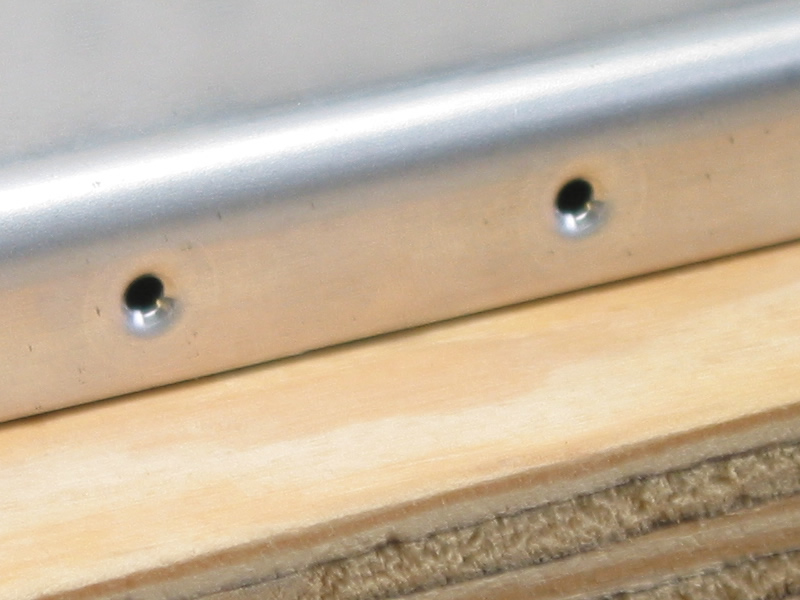
Did more deburring of the right hand HS skeleton. Here is an example of what deburring is. This is an example of what a typical hole looks like close up after drilling. Notice the raised edges...a rivet wouldn't be able to sit flush against the flange - so we need to fix this by deburring. | |||||||
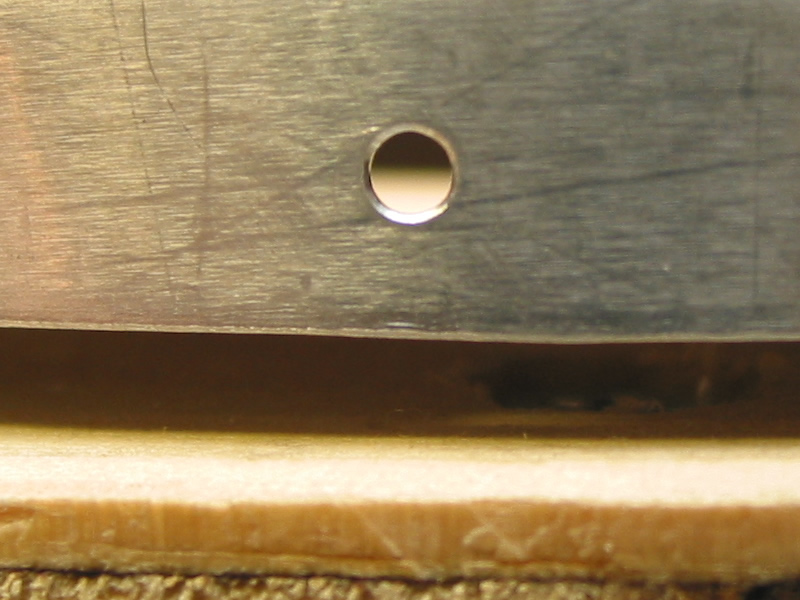 |
After a few quick twists of a deburring bit in my cordless screwdriver, the hole looks like this. No nasty edges. | ||||||||
|
8/28/03
(2 hrs) |
 |
Finished deburring skeleton (internal) parts of the horizontal stabilizer. Here is a group photo of the internal pieces. The parts near the top are the the left half of the HS and those on the bottom are for the right half. This will probably be one of the last times I'll take a pic while they're all shiney. I will begin the priming process for corrosion protection soon and they'll look bright white after that. | |||||||
|
9/01/03
(3 hrs) |
 |
Spent most of the day dimpling. The holes are dimpled so that the AN426 rivets can sit flush with the surface of the skin which reduces aerodynamic drag. Here is a pic of a flange with a few holes that have been dimpled. My pneumatic squeezer was able to reach almost all of the holes in the flanges. | |||||||
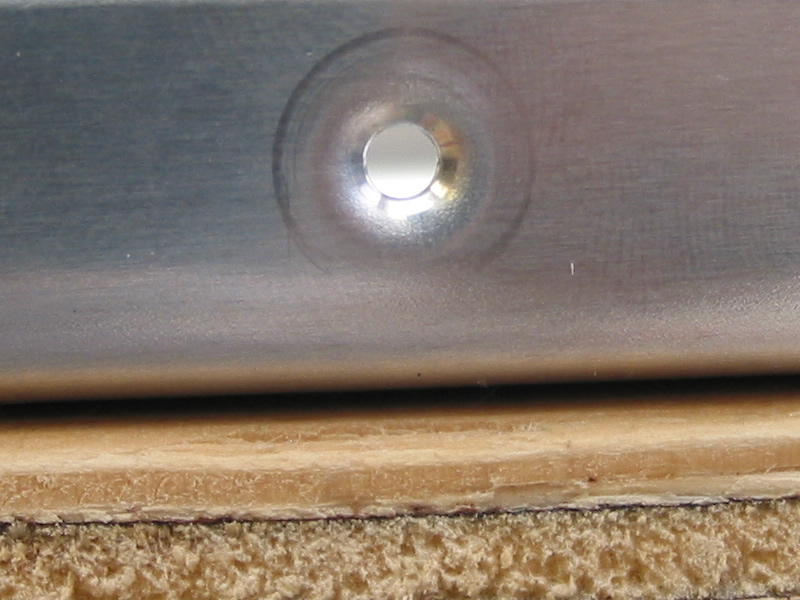 |
Here is a close up view of a typical hole that has been dimpled. | ||||||||
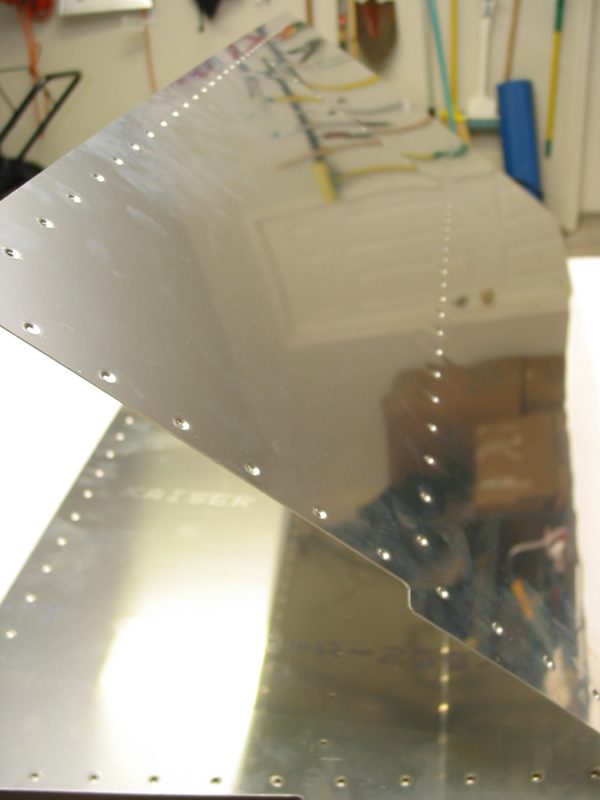 |
This is a view of a HS skin with holes that have been dimpled. The holes around the edges can be reached with the pneumatic squeezer, which by the way makes this job go very fast. The holes in the interior must be reached with the C-frame dimple tool. | ||||||||
|
9/07/03
(5 hrs) |
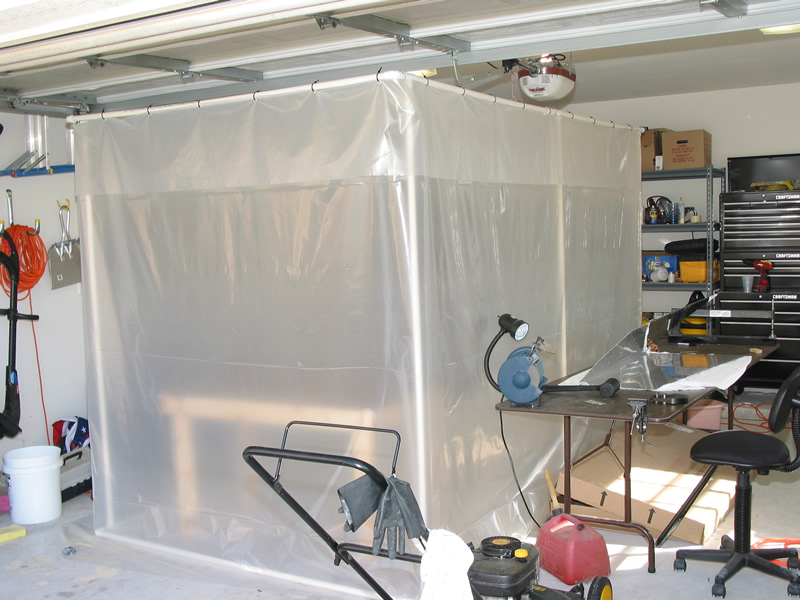 |
This is a view the primer/painting booth that I built in the garage, errrr, airplane hanger. Basically I used 3/4" PVC and glued the frame together then hung a 4 mil plastic drop cloth around the outside. I'm getting some weird looks from the neighbors...they probably think I've built a gas chamber or something. | |||||||
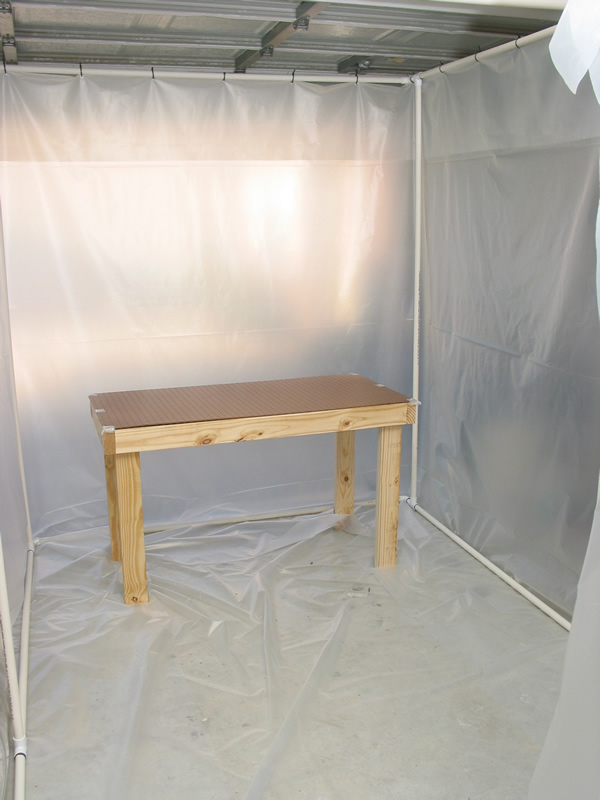 |
Here is an inside view. I built the cheap table with 2x4's and used perfboard as the top to help the airflow when I'm spraying. I haven't put a roof on the structure now...if I do decide to paint the exterior in here I'll probably add a roof and some fans and filters to keep the inside dust-free. | ||||||||
|
9/14/03
(1 hrs) |
 |
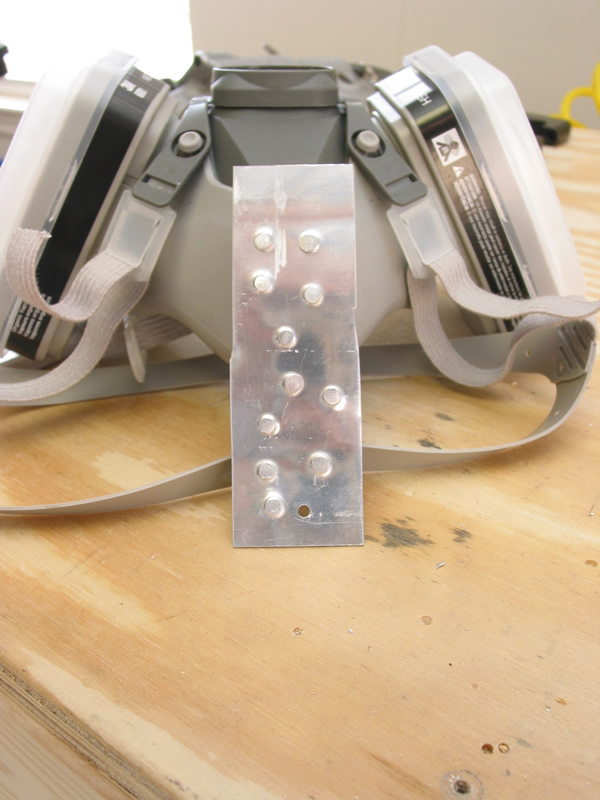
Well I built that fancy paint booth so I just had to try my hand at priming something. This is a scrap peice that I have practiced riveting. Don't worry, my rivets have improved somewhat since I bludgeoned this peice some time ago. The first step is to clean it with laquer thinner. Next you scrub it down for quite some time with aluminum etcher and a scotchbrite pad. This step removes the aluminum oxide coating to prep the surface for the primer. After etching, it looks like the photo to the left. Notice the lack of luster after scrubbing. | |||||||
 |
The photo at left is the other side of that same piece, and I have not done anything to the surface here. This is just for comparison to show what the surface looks like after etching compared to before. | ||||||||
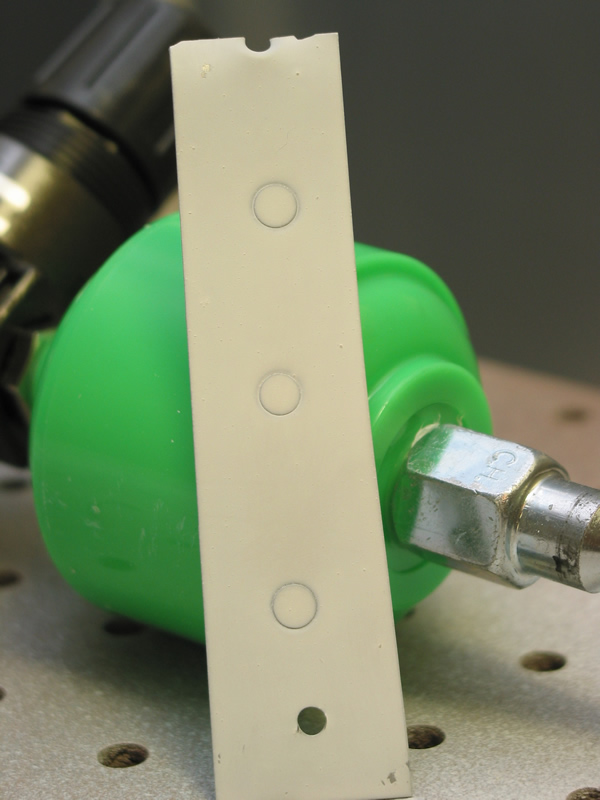 |
After priming the piece looks something like this. It is white in color and quite durable! The primer I'm using is water based (believe it or not) and is made by aircraft finishing systems. The only downside that I can see so far is that it takes a while to dry (around 15 minutes to totally dry). Other than that it there is no mixing, you just pour it right out of the bottle into the spray gun and have at it. | ||||||||
|
9/19/03
(1 hrs) |
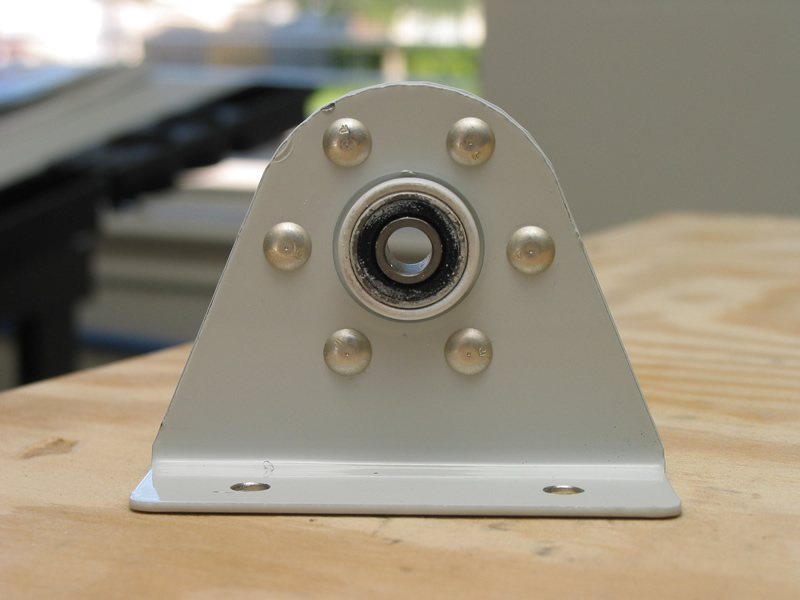 |
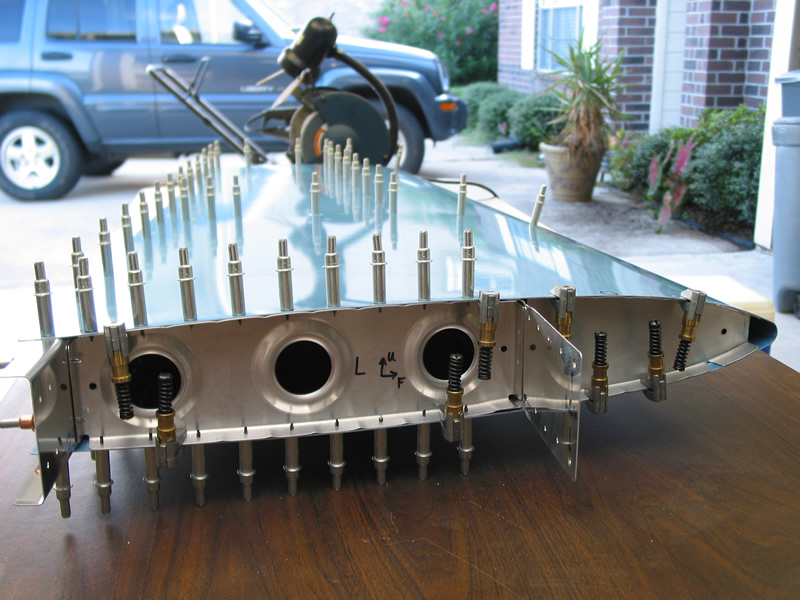
These are the first six rivets that I have set in my airplane! This is the horizontal stabilizer hinge bracket, and the black and silver object in the center is the hinge bearing itself. Basically this is part of the assembly that the elevators will attach to that allows them to freely swing up and down as you push and pull on the yoke. | |||||||
|
9/27/03
(3 hrs) |
 |
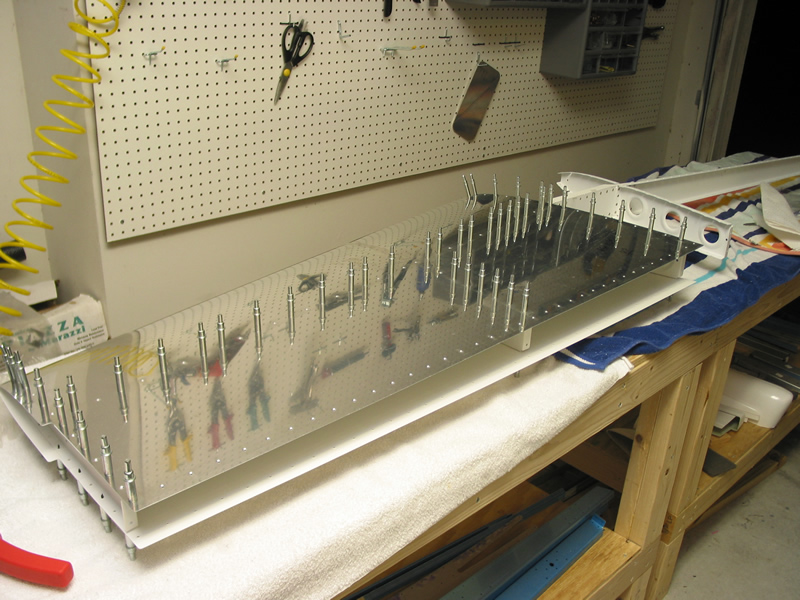
Here I have just finished priming the rear spar components of the horizontal stabilizer. You can see that I am wasting a lot of primer by spraying it all over the table. I think in the future I'll prepare a larger batch of pieces to prime at once so I don't waste as much primer. | |||||||
|
9/30/03
(3 hrs) |
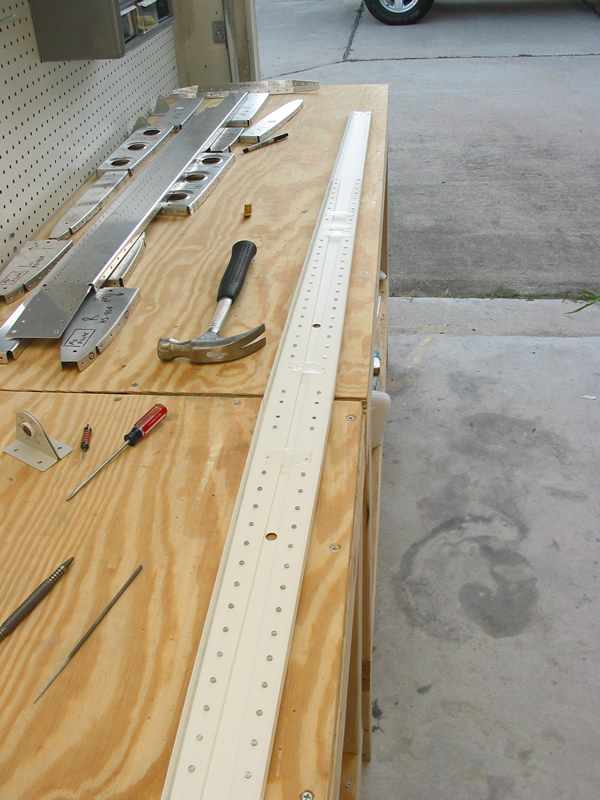 |
Here is the rear spar of the horizontal stabilizer with the spar stiffiners riveted to the inside of the spar. There is a hammer in the frame to show the scale of things. It is starting to look like a piece of an airplane! | |||||||
|
11/16/03
(4 hrs) |
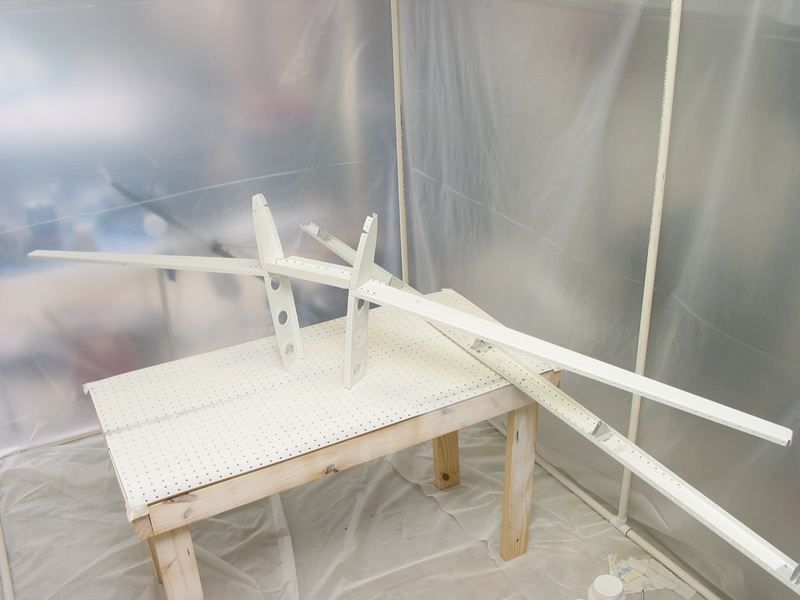 |
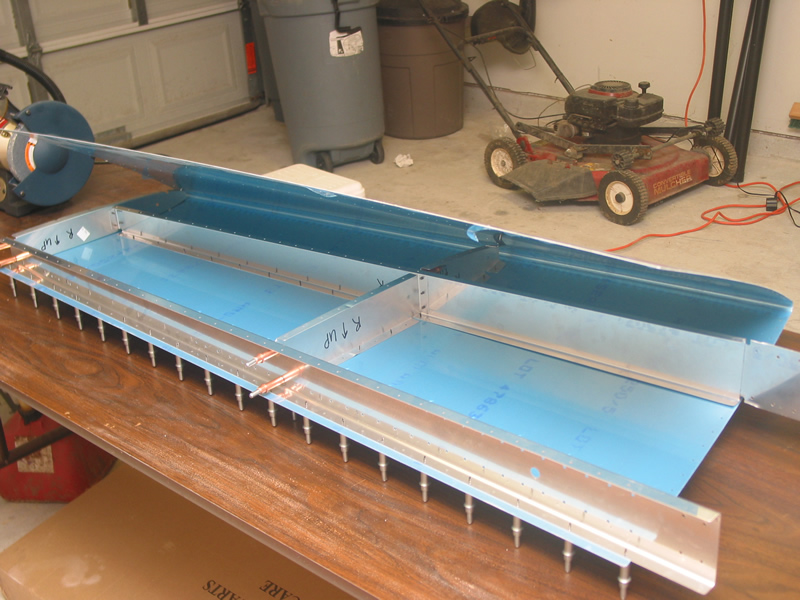
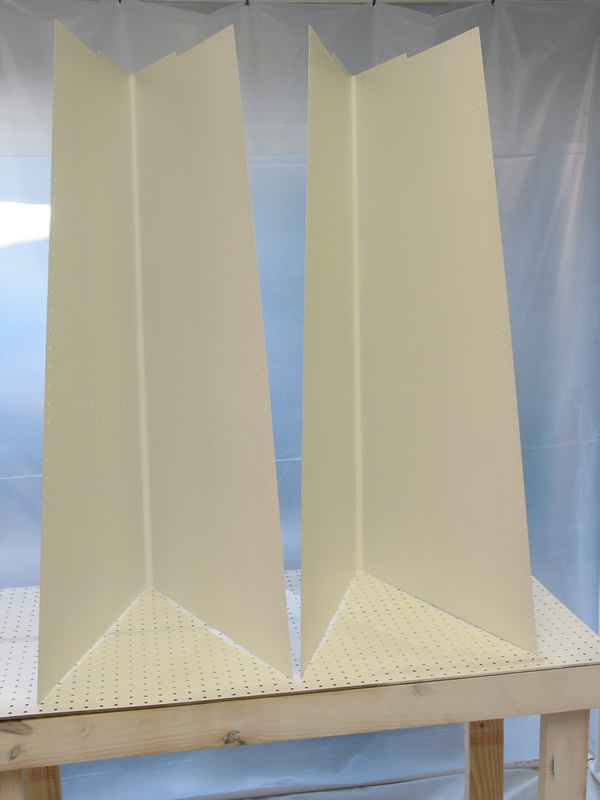
Well things have slowed down a bit on the airplane front. I have finally gotten a chance to break out the rivet gun and put together most of the HS skeleton. Here is a wide shot of the forward spar assembly of the HS "standing" next to the rear spar. | |||||||
 |
This is a close up shot of the center part of the HS skeleton so you can see how it goes together. It looks so simple (and it really is), but it takes so long to get to this point! | ||||||||
|
11/22/03
(2 hrs) |
 |
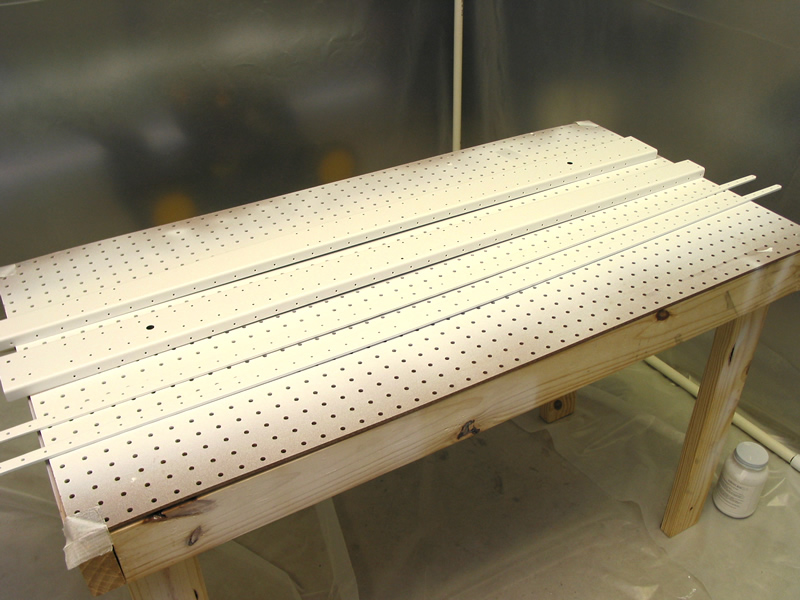
Finally gotten around to priming the inside of the skins of the horizontal stabilizer. Now everything is primed and I'm ready for final assembly (if I can find the time). | |||||||
|
12/20/03
(4 hrs) |
 |
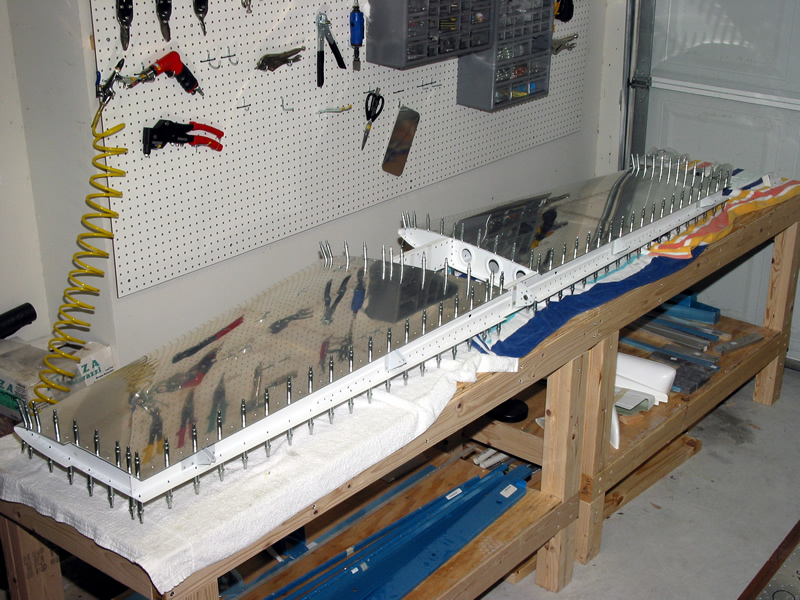
Well Greg Summers from work came over and we were finally able to make some progress on the HS. We began with the left side and put the skin over the skeleton and carefully lined up the holes and cleco'd it into place. It took us a while to get the hang of things. I had to learn just how hard and long to "hit" the rivet with the gun, and Greg had to learn how to wedge his hands into the structure with a bucking bar and try to hold it flush and firmly against the rivet without actually being able to look at it. Here we have finished riveting all of the rivets on the left side except for the ones along the edge which I can get with the squeezer later. | |||||||
|
12/23/03
(1.5 hrs) |
 |
I invited my sister Jessica over and gave her a crash course on riveting. We put the right side of the skin on and made some progress riveting together one of the forward ribs. Things are really moving along now. As soon as I can get another pair of hands after the holidays I should be able to finish the HS! | |||||||
|
1/04/04
(3 hrs) |
 |
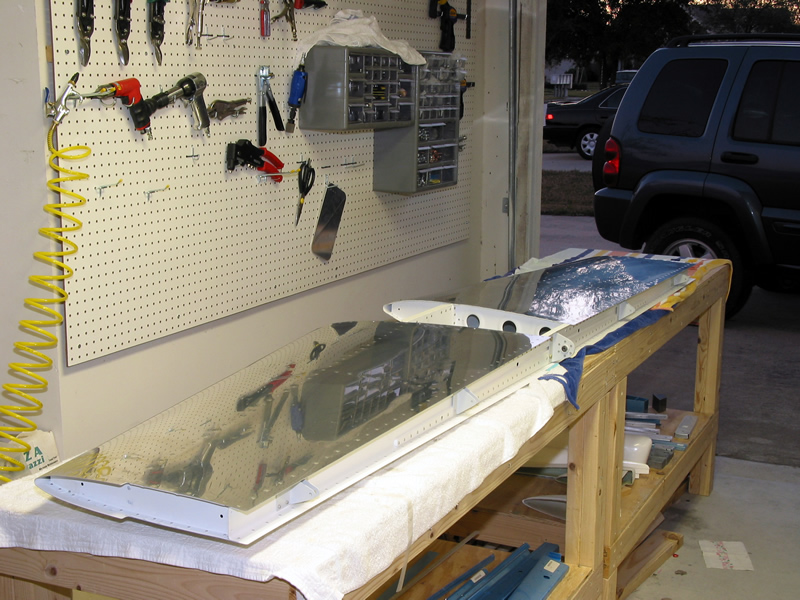
Finally able to make some more progress on the HS. With the help of my brother in law John I was able to finish riveting all of the interior rivets of the horizontal stabilizer. All thats needed now is to squeeze the rivets along the edge of the skins with the pneumatic rivet squeezer. | |||||||
|
1/05/04 |
Well I thought I could rivet all of the remaining edge rivets in the HS with my pneumatic squeezer. For the most part, this is true....but on the leading edges (the pointy end) of the ribs there are a few rivets that my yoke on the squeezer would not physically fit into. I invited my friend over to try to buck those few rivets with the good 'ole fashoned rivet gun but I didn't have a bucking bar small enough to fit in there either! I finally decided to stop while I was ahead and I ordered a thin-nose no-hole yoke for my squeezer. This has a really small tapered head that should be able to fit in these tight spaces. So 12 more rivets and this sucker is done! | ||||||||
|
1/19/04
(0.5 hrs) |
 |
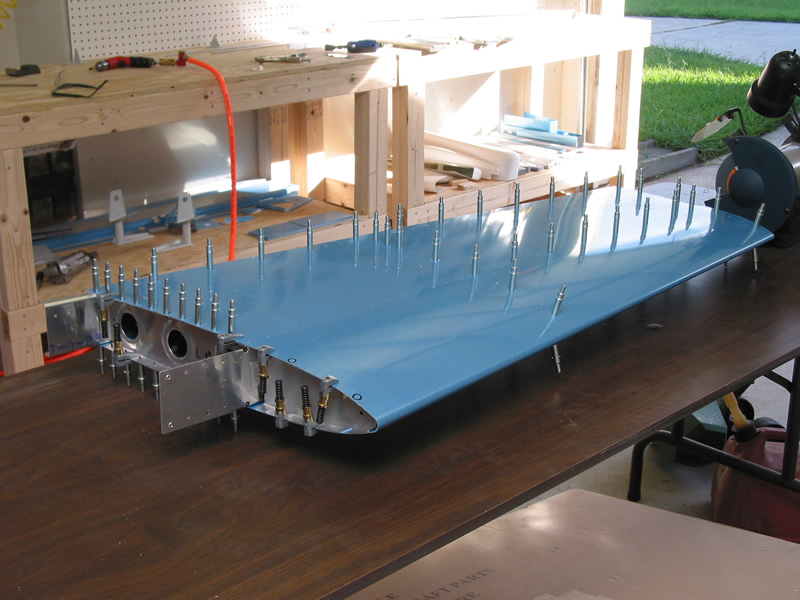
The Horizontal Stabilizer is complete! Today I set the final few rivets in the leading edge of the HS using a thin-nose no-hole yoke. Here is a pic of the first completed sub assembly of my airplane. Feels good to have made some visible progress, even though I am progressing at a snails pace. Total
time on the HS = 66 hours. |
|||||||